Lasers in the ditto
Dealing with lasers isn’t easy, neither is using them correctly. In the Falco ditto you have to do both at the same time.
It’s not rare for Falco players to dislike or be inconsistent in the mirror, and in my opinion it has to do with how limited Falco’s basic options are when dealing with lasers, his dash is slow, isn’t very good at low profiling and his full hop goes very high. This leads to people feeling trapped by lasers and disengaging by going to platforms or jumping around, hoping the opposing Falco will miss the timing to catch them. For a player with the better punish game, this might not seem like a problem, they just need to get lucky or get a single opening to take a stock, but it’s not a very sustainable strategy, which leads to top Falco players trading sets all over the place.
In this context, I’ll try to break down some important concepts and their applications.
Heights
Because there’s a million heights, I’ll talk about 3 of them that I find especially important:
- Beak
- Low
- High
Beak lasers are called that because they’re shot at the height of Falco’s beak when idle, this lasers are very useful vs Fox and Falco because it’s not possible to dash/run under them, nor short hop over them (outside of a big exception I’ll go over later). From the offensive side that sounds pretty good, but that doesn’t mean there’s nothing you can do about them, crouch or a wavedash will go under them. They also allow you to beat people using shine to reflect lasers:
Since this height covers a lot of options, you can treat is as your go-to vs spacies, but be aware they can counter it by going under, this is especially important in the ditto when both Falco’s are shooting:
In this example, both Falcos shoot the first laser at the exact same time, blue Falco then instantly goes for another laser, while neutral Falco waits in his landing animation (you can crouch too, and it’s better cause you also cover a low laser hitting you with cc). This leads to blue Falco jumping into a laser, while neutral Falco dodges. Afterwards neutral Falco just shoots a bit lower asap, which stops blue Falco from getting his own laser out (he’s acting frame perfectly) or going under. This forces the Falco who lost the interaction to shield or move, trying to shoot back isn’t gonna get him anything.
Low lasers give the most frame advantage and are harder to powershield in lots of situations, especially against characters who crouch/dash powershield (Marth being the most common due to his bugged shield). When the opponent actually powershields a low laser you get to easily go over it, but that means the opponent could have jumped over it instead, which can lead to losing laser control in the ditto.
High lasers are good when the opponent is on a platform or coming down on you. In certain matchups, like Falcon and Samus, they’re very important in neutral. Vs Falcon high lasers will help you keep him grounded (keep in mind side B goes through most lasers, only low lasers will usually work against it because they hit his hand).
Against Samus, you want to shoot low lasers if she’s grounded (her shield is bugged just like Marth’s) but once she’s on a platform, if you do high laser into high approaching laser she cannot get down without getting hit, there’s not enough time no matter what she does. This means no missiles or aerials while you get under her.
This concept, laser in place into approaching laser, is very important in the ditto too, because the opposing Falco won’t be able to laser you back. This brings us to a very important concept, if you shoot consecutive lasers in place, frame advantage is not affected by distance unless someone moves: whatever extra frame advantage you get from the laser travel time is eaten up by the next laser’s travel time, it takes longer to reach the opponent so they even out.
You can look at it like this, frame advantage for a laser is gonna be
(laser's stun) - (4 frames of Falco's landing animation) + (travel time)
then the total startup for the next laser is
(kneebend) + (airborne frames before pressing B) + (12 frames of laser startup) + (travel time)
If no one moves travel time is the same for both equations and it cancels out, so whenever you lab something involving more than 1 laser in place, remember that distance is not affecting the frame data, but what you can get hit by (or hit them with) does change.
Setchi recently posted about this on twitter if you’re interested in how it looks in-game.
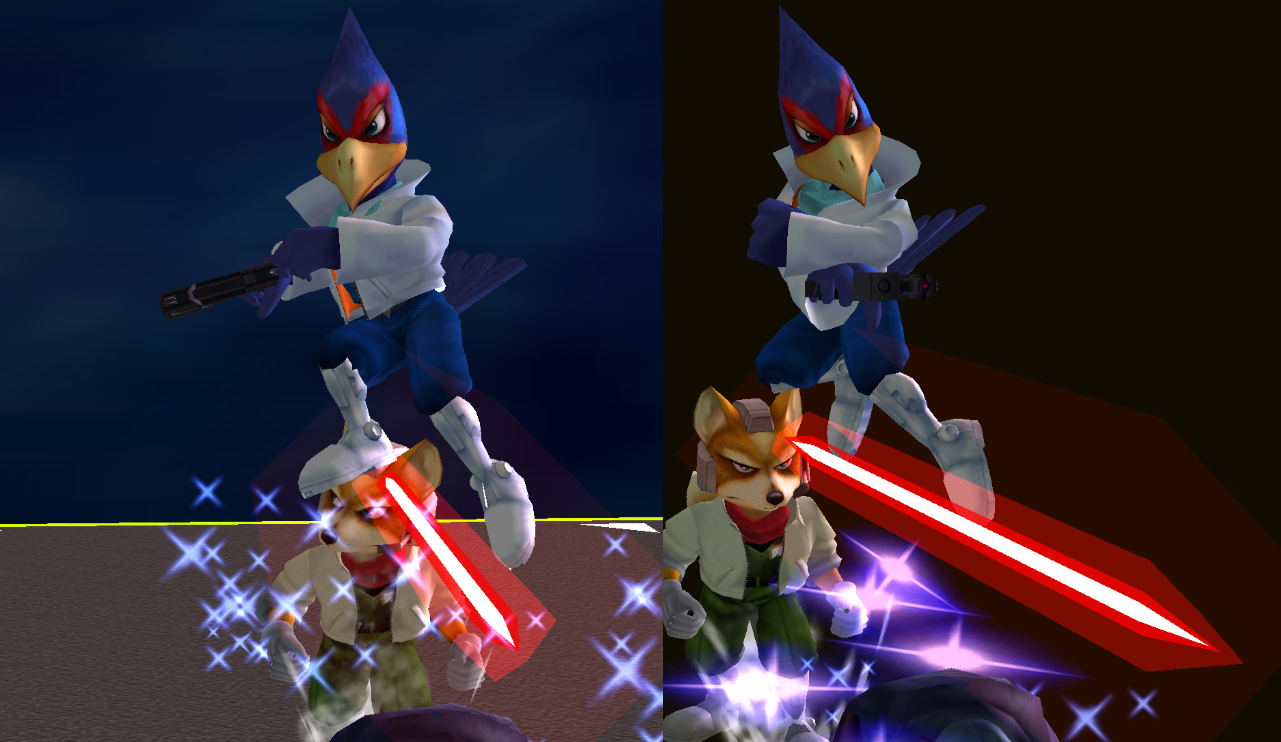
An uncommon option are TRT lasers (named after The Real Thing from Ohio who uses them a lot), the idea is you don’t challenge a laser by going over or under, instead you laser through them. This works because the startup of laser has Falco opening up his legs, so lasers can go right in between, then he bends his knees, so he keeps dodging. As far as lasers are concerned, his legs don’t exist except on the frame where they cross each other.
 Another way to use this is with a sh back (backflip): if you just backflip you’ll fall into the laser unless you match the precise timing of the incoming projectile. The solution is to laser as Falco’s stops being horizontal, you’ll dodge the opponent’s shot using the hurtbox distortion as with a TRT laser. This lets you do other laser timings and heights while still dodging. Credit goes to Flash for labbing this concept.
I’m too close for all of that, what do I do?
At closer ranges, there’s usually not enough time to retake laser control without eating a foot to the head, so you’ll have to go for other options.
Some of the classics are take laser uptilt and full hop, but there’s a few others that should be part of every Falco’s repertoire. These are:
- wavedash in shine to call out a laser or late aerial: wd to their landing spot or get under them as they jump, requires a read on their movement but the reward is huge.
- take laser zhu dair: the Falco equivalent of the Lord stomp, you dash away then dair, avoiding an immediate attack and whiff punishing it at the same time.
- dash away and powershield: you get tiny bit of extra leniency to powershield, because you get Falco’s head out of the powershield bubble.

- dash away and try to backflip laser or bair: laser to call out a laser, bair against approaching aerials.
This last option can easily end up badly if you get shot out of the air, the opponent could aerial afterwards and get a combo, but you can buffer a double jump out of hitstun by pressing a jump button or tap jumping. This is one of the few true buffers in melee, and lasts for 20 frames. That covers all of the laser hitstun, which makes it a 9 frame window (works as long as you don’t input the jump during hitlag).
This is useful whenever you get shot out of the air, if you’re just falling after eating a laser, you’re gonna have a lot of trouble in the ditto.
The following video is a good watch to see how these concepts play out in real time.
https://www.youtube.com/watch?v=tNj6L7fe2L0
It’s netplay between Flash (Ohio, USA) vs Frenzy (Bristol, England), they both do a lot of other cool stuff outside lasers so it’s useful to study for the ditto in general.
If you think something wasn’t clear enough, I made a mistake, or didn’t include something important, please reach out either via Twitter or Discord.